Craft Luntik from plastic bottles. Crafts from plastic bottles with a child. Making a faucet extension from plastic bottles with your own hands
Useful tips
Plastic products are used everywhere because they require less investment to create than products made from other materials.
However, discarded plastic can take hundreds or even thousands of years to decompose, so it is important to recycle it or avoid plastic altogether.
The second option is very difficult to implement today, so recycling comes to the fore. Plastic can be sent to special factories for recycling it, or you can make useful things out of it.
In this collection you will learn how to make various useful things for your home and garden from plastic bottles.
1. DIY ottoman made from plastic bottles step by step

You will need:
Plastic bottles
Foam rubber
Knitting needles
Ruler
Scissors
Sewing machine
1. Wash and dry several plastic bottles covered with caps. Gather all the bottles in a circle and secure them together with tape.
2. Cut two circles from cardboard to cover the top and bottom of all connected bottles. Tape these circles to the connected bottles.

3. Prepare two rectangular pieces of foam rubber and one round piece. Rectangular pieces should be used to cover the side of the collected bottles, and a round piece should be used to cover the top part. Secure everything with tape.

4. Make a cover for your seat from any fabric. If you like to knit, you can knit a cover.


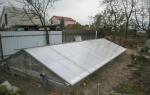
2. We make a faucet extension from plastic bottles with our own hands
It will be more convenient for children to wash their hands.


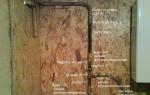
3. DIY products made from plastic bottles: pocket for a rag/sponge

1. Cut the bottle into the desired shape.
2. Sand the edges with sandpaper.
3. Hang on the faucet.
4. How to make a bag from plastic bottles

Photo instructions


Video instruction
5. What can be made from plastic bottles: cups for storing cosmetics

6. Feeder made of plastic bottles for a cat or dog
There are many ways to make bird feeders, but this one is designed for cats and dogs.

You will need:
2 large plastic bottles
Scissors
1. In the middle of one bottle you need to make holes slightly larger than the neck of the other bottle.
2. The second bottle needs to be cut in half crosswise.
3. Fill the bottom with food.
4. Connect the parts and open the lid.
7. Vase for sweets: master class on crafts from plastic bottles

You will need:
Plate, round plastic or thick cardboard
6 two-liter plastic bottles
Wooden or plastic rod (you can use a straight branch of suitable diameter and length)
Super glue
Spray paint and glitter (optional)
1. Making the base for the craft. To do this you need a plate, ceramic or glass plate. In the middle of the plate you need to enlarge the hole to 10 mm using a drill.

2. You will also need to use a drill to make holes in the center of the three plastic bottle pieces you will be using. It's easier to drill from the inside out.

3. Cut off the bottom of each of the 6 plastic bottles. Place 3 parts on the rod and secure with glue. Glue the remaining parts to the base (plate) around the rod. If you wish, you can spray paint everything.

It is worth noting that the rod is held on the base thanks to a plastic part that is glued to the plate, as well as to the rod itself.
4. If you wish, you can decorate your vase.


8. DIY wicker baskets from plastic bottles (master class)

And here is a version of a wicker basket made from plastic cocktail tubes:

9. Garden crafts made from plastic bottles (photo): broom

1. Remove the label from the plastic bottle.
2. Using a utility knife, cut off the bottom of the bottle.

3. Start making cuts on the bottle, leaving 1 cm between each.

4. Cut off the neck of the bottle.

5. Repeat steps 1-4 with 3 more bottles. Leave one bottle with a neck.
6. Place all the cut neckless bottles on top of one necked bottle. You will have a blank for a broom.

7. Cut off the top of one bottle and place it over the resulting blank.


8. Make two holes through all the bottles and insert wire into them and wrap the ends.
9. Insert a stick or rod into the neck and secure with a nail. You can also use glue.


Video instruction
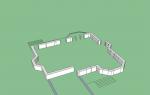
10. Modular boxes: description of crafts made from plastic bottles

You will need:
Several large plastic bottles or canisters
Stationery knife
Scissors
Marker or pencil
Strong thread.
1. Cut a suitable hole from a bottle or canister using a utility knife and/or scissors. It should not be too small for everything to fit, or too large for the plastic structure to fall apart.

2. Start connecting the bottles with a strong thread. Start with two, then add two more already connected to them, and so on. Tie strong knots. You can also try using hot glue or superglue (Moment glue).

3. Assemble a design that is convenient for you. You decide how many rows and “floors” to make. However, it is worth knowing that the higher the structure, the less stable it is. You may need to secure the entire structure with rope again.

4. It's time to put scattered things on the shelf.
A child can come up with a huge amount of entertainment, but we’ll talk about such leisure activities as crafts made independently from plastic bottles. There are many positive aspects here, one of which is the development of creative thinking in a child; in addition, games can unite a child with an adult, since in this case they have common interests.

Everyone has a lot of unnecessary parts of food packaging, plastic bottles, plastic straws, corks and much more in their home. All this sooner or later goes to waste. Few people think that all these products can be reused, thereby giving them a second life. One option is to make children's toys from plastic bottles. Children instantly learn this simple activity and manage to surprise not only their parents, but also loved ones.
From such bottles you can make a variety of products, different in shape, color and size. Example options: vase, sprinklers, as well as various figures in the form of animals, birds, cartoon characters. For experienced “creators”, you can focus on making flowers, stars, butterflies, cut out from bottles, “caps” for lighting fixtures and various other products.
Let's consider several options separately. First, let's describe how to make a delightful vase from a plastic bottle. The child needs to be helped in this matter and trusted to independently complete some of the simplest elements.


If you have a lot of bottles in your house, you shouldn’t throw them away right away; in the summer, you can use them to create an excellent raft. And for people living close to a pond, it will be a great opportunity to please both their child and those around them. The main rule is to never forget that all children's games related to water should be under the careful supervision of adults.

In addition to all of the above, you can make many other equally interesting products from plastic straws and disposable glasses. Cut out faces, eyes, paws and tails from hard paper of different colors, and then glue them to the glasses. Using straws you can make legs and arms. Thus, you get a lot of cute and funny little animals that you can play with or put on performances with.

Yogurt cups are also ideal for creating cartoon characters to put on your fingers. Draw faces, ears, eyes and everything else necessary on paper, try to make the drawing look like the intended character. Cut out and glue onto an upside down glass. Add a head of hair made of thread to your look, and dress it in an outfit made of fur or fabric. For a small child, playing with fingers contributes to the development of manual work and imagination. You can also cut the straws with scissors and put them on a thread to make beads or bracelets.

Don’t forget about the other inhabitants of the house – animals. You can also make a useful product for them, for example, a house or bottle feeder, in which the bird will live.
Watch the video: Bird feeder made from a plastic bottle
You can launch a boat made with your own hands from plastic bottles. It will be interesting for a child to play with such a craft, especially if he is located next to a pond. And the fact that he himself will take part in the production will add even more attention to it.
To do this you need:
- plastic bottle, 2 liters capacity
- three sticks made of plastic or wood (one 15 cm long, the second 25 cm)
- multi-colored thick paper
- plasticine
- threads
1. Cut the bottle, in appearance it will resemble the base of a ship
2. Using plasticine we sculpt three pieces that will be the bottom of the boat
3. Cut out sails from multi-colored paper. One is 14*22 cm in size, and two are 10*8 cm in size. The first one can be in the shape of a triangle, and the rest can be rectangular.

4. Carefully, trying not to damage anything, cut out or use a hole punch to make two holes that should fit our sticks. They will be located at the top and bottom of the sail, and we string them on sticks.

5. We stick the resulting sails into the bottom of the boat (you need to follow the rule - install the long mast in the middle, the rest along the edges).

6. We wrap the mast with threads.
7. We do a test “launch” of the ship on the water to check how it stands. Add a little plasticine if necessary.
8. Everything is ready. You can safely give the boat to your child; it can be used both in the bathroom at home and outside.

Making crafts with your own hands using ordinary, seemingly useless plastic bottles is not at all difficult. And the result is delightful and unique. All of the above is only a small part of what is possible. Over time, making various products will become easier and much faster.
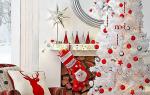
Luntik is a very popular character in children's cartoons and a desirable toy for every child. However, you don’t have to buy such a toy in a store - you can make a craft in the form of a character called “Luntik” from scrap materials with your own hands.
Making the “Luntik” craft with your own hands in a step-by-step lesson
The most popular and easiest ways to make luntik are:
- Luntik made of fabric (felt or fleece), filled with filler;
- Luntik made of paper;
- Crocheted Luntik;
- Luntik made of beads;
- Luntik made from balloons;
- Luntik from plastic bottles;
Necessary materials:
- Fabric, fleece or felt (white, lilac and purple);
- Suede black and purple;
- Filler;
- Purple and white floss;
- Threads to match;
- White shoe thread;
- Glue.
First you need to make patterns. You can draw it yourself, but it would be better to print out photos of patterns from the Internet.

According to these patterns, it is necessary to cut out all the details with an allowance of about three millimeters, except for the details of the ears, fingers and appliqués on the stomach.
The ear parts are sewn using the needle forward method using small stitches on both sides. Then the product is turned over and the stitches are passed along a new one between the previous stitches. After all the stitches are ready, the product needs to be slightly aligned on the sides, since parts of the product may have shifted slightly when sewing.
The ears will need to be folded with the bottom edges inward and sewn with a couple of stitches. After this, you can trim off all the knots. All the remaining ears are sewn together in the same way; there should be four pieces in total.
Now it's the turn of the pens. Before sewing on the fingers, you must first place them in their places and glue them with glue. After the glue has dried, the fingers can be sewn on with thread.
Then the parts of the handle itself are sewn together, at the end a gap is left through which it is necessary to fill the handle with filler
After the handles, you can move on to the legs; they are sewn together according to the same principle: first the fingers are glued and sewn together, then the legs, a gap is left and the product is filled with padding polyester. When the product is ready, you can make ties on your fingers using white thread.
The tail is next in line: its parts are sewn together, after which it is sewn to the back using a hidden seam.
On the details of the head and belly, all the darts are sewn and all the appliqués that should be according to the patterns are sewn on.

Purple floss should be used to embroider the nose, and white floss should be used to embroider the pupils of the eyes. The next piece will be the neck: it is sewn together like the previous fragments and not stuffed too much with filler.
Now you can collect luntik. First you need to mark the place of the legs and sew them together with two parts of the abdomen, then fill the body with padding polyester. Then the arms are sewn on.
The head of the luntik is sewn together according to the type of previous parts - first, fragments of the head itself are sewn together, and then filler is put into it. After this, the neck is sewn to the body, and the head is sewn to the neck. Luntik is ready!

Making a luntik from paper is very simple, just look at the character carefully and cut out the necessary details from colored paper. All parts are glued together and then the product must be dried. This craft can be made three-dimensional, or it can be made flat.
Luntik crochetTo crochet a luntik you will need:
- Hook
- Iris is lilac and violet in color;
- Beads;
- Scheme.
The pattern for crocheting a luntik is very simple and can be easily found on handicraft websites and in master classes of experienced craftswomen and needlewomen.

Crafts made from bottles are very popular due to their simplicity and attractiveness. The material can always be collected and there is no need to spend extra money on additional tools.
In order to assemble luntik from bottles, you need to have in your arsenal a supply of small plastic bottles (for milk, kefir, soda, mineral water, etc.) and paints in purple shades. The idea of how exactly to assemble a luntik can be found on handicraft websites.
Luntik made of beads.A beaded Luntik can become a charming keychain that any child will love.
To weave a luntik from beads, you need wire or fishing line (depending on the type of figure and pattern), purple, lilac and white beads, a needle and larger beads for the eyes.

This craft will be a wonderful gift for a child’s birthday. To make a luntik from balloons, you will need inflatable balloons in pearlescent purple, dark and light lilac shades, as well as special paints that will stick to the balloons. Photos and videos of how to make a luntik from balloons can be viewed on the Internet.
Video on the topic of the article